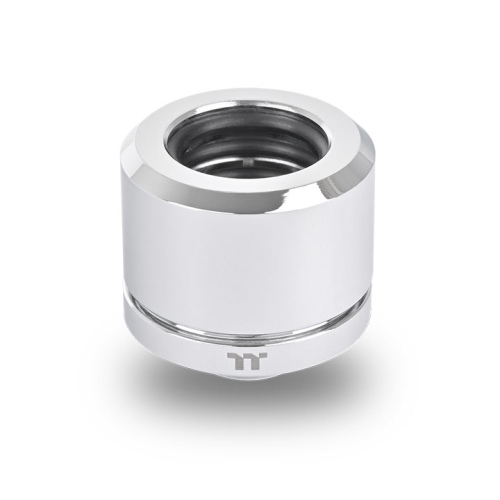
Sleek Mirror Polished Design
The Pacific F-Pro Fittings undergo a meticulous treatment, resulting in a flawless mirror-polished surface. This premium design enhances visual appeal, elevating custom liquid cooling configurations’ aesthetics with a stylish and concise look.

Easy and Reliable Installation
Pacific F-Pro Hard Tube 16mm OD Compression can be used with PCTG, PETG, Acrylic, and Glass tubes with 16mm in outer diameter (OD), and it is compatible with G1/4 screw threads. Equipped with four O-Rings, it ensures a more secure seal and reliable performance to build water-cooling loops.

Caution: For added convenience during installation, consider wearing non-slip gloves to ensure secure grip while tightening and adjusting fittings.
Thermaltake Pacific F-Pro Fittings Installation Guide
Step 1. Slide the compression nut over the tube
Step 2. Install the O-Ring
Step 3. Install the packing
Step 4. Install the fitting base on your components
Step 5. Tighten the compression nut
Caution:
The O-Ring and the packing with a groove on the inside diameter must always be installed towards the top of the compression nut.

Cautions
Thermaltake recommends the following steps to be taken after completing your water loop setup:
- It is strongly recommended to use market-proven pre-mixed coolant, such as Thermaltake Coolant 1000, which offers great performance while preventing corrosion in the entire cooling system (copper, brass, nickel, aluminum, and steel).
- Fill the reservoir with coolant and cycle the power on and off several times while the pump pushes the coolant into the loop.
- DO NOT let the pump run dry. If no liquid is entering the pump, turn off the power immediately.
- Fill the reservoir to the top to prevent air from entering the pump.
- If necessary, tilt the system slightly from side to side to bleed the air out of the loop.
- Place paper towels under fittings and joining points to test for leaks.
- Run the loop with the fill port open for about 24 hours to completely bleed the air out of the loop.
- Before starting, flush out the system properly to prevent any coolant or unwanted particles from sticking to your tubes, radiators, and other cooling components.
- Coolant might fade over time.
| P/N | CL-W436-CU16SL-A |
|---|---|
| Dimensions | ∮24 x 23.6 (H) (mm) |
| Note | Connector To Hard Tube |
| Applicable | OD : 16 mm |
| Screw Thread | G 1/4 |
| Heatsink Material | Copper |


